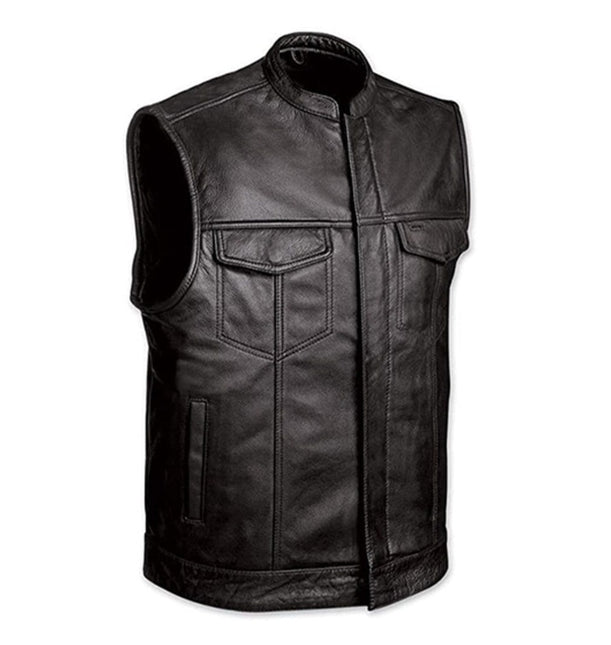
How to Clean and Condition a Leather Motorcycle Vest at Home
, by Syed Khawar Bukhari , 13 min reading time
, by Syed Khawar Bukhari , 13 min reading time
If you ride, your leather motorcycle vest is more than just a piece of clothing. It is a badge of identity, a layer of protection, and often a canvas for patches and memories collected over years on the road. That is exactly why keeping it clean and conditioned is not just about looks. It is about preserving something that matters. The good news is that you do not need to drop it off at a professional cleaner or spend a fortune at a leather shop. With the right approach and a little time, you can clean and condition your leather motorcycle vest right at home and have it looking sharp for years to come.
Before you dive into the cleaning process, gathering the right supplies makes all the difference. You do not want to grab whatever soap is sitting next to your kitchen sink and start scrubbing away. Leather is a natural material, and it responds badly to harsh chemicals, excessive water, and rough handling. Here is what you will typically need: a soft-bristled brush or a dry microfiber cloth, a leather-specific cleaner or a very mild saddle soap, a separate clean cloth for applying conditioner, a high-quality leather conditioner or mink oil, and a well-ventilated space away from direct sunlight or heat sources.
Using the right products matters more than most riders realize. A leather cleaner formulated for garments is very different from a leather cleaner made for furniture or car seats. Always opt for products designed for clothing-grade leather when you are working on your vest.
Leather is essentially skin, and just like your own skin, it dries out, cracks, and becomes damaged when neglected. A motorcycle vest takes a beating. It faces wind, rain, road grime, sweat, and UV exposure every single time you ride. Over time, dirt and oils break down the leather's natural fibers, making it stiff, brittle, and prone to cracking. Conditioning replenishes the natural oils that leather loses through regular wear and environmental exposure.
Riders who skip this step often notice their vests developing fine cracks along fold lines, fading of color, and a rough texture that never quite feels right. Regular maintenance, even just a few times a year, can dramatically extend the lifespan of your vest and keep it flexible, supple, and looking the way it should.
Start dry. Before applying any liquid product to your vest, take your soft-bristled brush or dry microfiber cloth and gently go over the entire surface. Pay close attention to seams, creases, and around any patches or hardware where dust and grime tend to collect. This dry brushing step prevents you from grinding surface debris deeper into the leather when you begin the wet cleaning process.
This step is one that most people skip and later regret. Take a small amount of your leather cleaner and apply it to a hidden spot on the vest, such as the inside lining near the hem or an area hidden under a patch. Wait a few minutes and check for any discoloration, staining, or unusual reaction. Different dyes and leather finishes respond differently to cleaners, and a small test can save you from ruining the entire vest.
Dampen a clean microfiber cloth with your leather cleaner. Do not soak the cloth and do not apply the cleaner directly onto the vest. Work in small circular motions, starting from the top of the vest and moving downward. Use gentle but consistent pressure. You will notice the cloth picking up dirt and grime as you go. Flip to a clean section of the cloth regularly so you are not just spreading the dirt around.
For particularly stubborn spots like bug splatter, road tar, or dried mud, you may need to let the cleaner sit for a minute before gently working it loose. Never scrub aggressively. Hard scrubbing can scuff the surface of the leather and damage the finish permanently.
Once you have worked the cleaner across the entire vest, take a fresh damp cloth and lightly wipe the surface to remove any leftover cleaner residue. Then follow with a dry cloth to absorb moisture. You do not want the leather sitting wet for any length of time.
This is non-negotiable. Hang your vest in a cool, well-ventilated space and let it air dry completely before moving to the conditioning step. Keep it away from radiators, hair dryers, direct sunlight, and any other heat sources. Heat causes leather to dry out too quickly, which leads to cracking and warping. Depending on how wet the vest got during cleaning, drying can take anywhere from a couple of hours to overnight.
Not all conditioners are created equal. For a leather motorcycle vest, you want something that penetrates well without leaving a heavy, greasy residue. Mink oil, neatsfoot oil, and purpose-built leather conditioners are all solid choices. Some riders swear by products like Leather Honey or Bickmore Bick 4, both of which condition deeply without altering the color dramatically. Avoid petroleum-based products or anything with silicone, as these can damage leather over time.
Take a clean, soft cloth and apply a small amount of conditioner to it. Work the conditioner into the leather using smooth, circular motions. Just like the cleaning step, start at the top and work your way down. The goal here is even coverage, not heavy application. A thin, even coat is far more effective than globbing on a thick layer that the leather cannot absorb.
Pay extra attention to stress points like the shoulder areas, armhole edges, and along the front zipper. These are the areas that flex the most and tend to dry out and crack first.
Seams and fold lines are where cracking almost always starts. Use your finger or a cotton swab to work a small amount of conditioner directly into these areas. The conditioner needs to get into these tight spaces to keep the leather flexible where it needs to be most.
After applying the conditioner, let the vest sit for at least 30 minutes to an hour. Some conditioners recommend leaving them overnight for a deep treatment. Hang the vest during this time so it holds its shape. You will likely notice the leather looking slightly darker or richer immediately after application. This usually evens out as the conditioner absorbs fully.
Once the conditioner has absorbed, take a clean dry cloth and gently buff the surface of the vest. This removes any excess product sitting on the surface and brings up a nice, natural sheen. Your vest should feel noticeably softer and more supple than it did before, and the surface should look refreshed without appearing overly greasy or wet.
Most motorcycle vests carry patches, pins, and metal hardware that require a little extra care during the cleaning and conditioning process. When cleaning around embroidered patches, avoid getting them saturated with cleaner or conditioner. Excess moisture can cause patch edges to curl or backing materials to degrade. Use a cotton swab to clean carefully around patch edges rather than dragging a cloth directly over them.
For metal hardware like zippers, snaps, and buckles, wipe them down separately with a damp cloth. If there is any oxidation or tarnish, a small amount of metal polish applied with a cotton ball works well. Just make sure the polish does not touch the leather itself, as it can stain.
The honest answer depends on how often you ride and the conditions you ride in. For regular riders who are out several times a week, cleaning the vest every two to three months and conditioning it at least twice a year is a reasonable baseline. If you have ridden through rain, dust storms, or heavy traffic, clean the vest sooner rather than later.
A good way to judge whether your vest needs conditioning is to place a small drop of water on the leather surface. If the water beads up and sits on top, the leather still has enough oil content. If the water soaks in almost immediately, it is time to condition.
Many riders unintentionally damage their vests by using the wrong products or techniques. Never use dish soap, laundry detergent, or all-purpose household cleaners on leather. These strip away the natural oils almost instantly. Never put a leather vest in the washing machine or dryer under any circumstances. The agitation and heat will ruin it beyond repair. Avoid over-wetting the leather during cleaning, and always dry naturally away from heat.
Another common mistake is applying too much conditioner and not buffing the excess away. Leather can only absorb so much. Whatever does not absorb just sits on the surface, attracting more dirt and making the vest feel tacky.
Proper storage is part of the overall care routine. Hang your vest on a wide, padded hanger to help it maintain its shape. Avoid folding and cramming it into a drawer or bag for extended periods, as this creates permanent crease marks. Store it in a cool, dry place away from direct sunlight. If you are storing it long-term through winter, consider covering it with a breathable cloth bag rather than a plastic one. Plastic traps moisture and can promote mildew.
This question comes up often, and the answer requires some nuance. White vinegar diluted with water can be used in a pinch to remove surface mildew or light staining, but it should be used sparingly and followed by conditioning since it can be mildly drying. Baby wipes are sometimes used for very light cleaning between rides. Olive oil and coconut oil are sometimes suggested as natural conditioners, but they carry the risk of going rancid inside the leather over time and can darken the material significantly. For best results, purpose-made leather products are always the safer and more effective choice.
Cleaning and conditioning your leather motorcycle vest at home is completely achievable with the right products, a patient approach, and a little know-how. The process does not need to be complicated or expensive. What it does require is consistency and care. Treat your vest well, clean it when it needs it, condition it regularly, and store it properly, and it will reward you with years of great looks and reliable performance on the road. A well-maintained leather vest is not just gear. It is part of who you are as a rider, and it deserves the attention.
1. Can I use regular soap to clean my leather motorcycle vest?
No, regular soap strips the natural oils from leather and causes it to dry out and crack over time. Always use a cleaner specifically formulated for leather garments to keep the material healthy and supple.
2. How often should I condition my leather motorcycle vest?
For most riders, conditioning the vest at least twice a year is sufficient. However, if you ride frequently or in harsh conditions like rain, dust, or extreme heat, conditioning it every three to four months will give you better results.
3. What happens if my leather vest gets soaked in rain?
Let it dry naturally at room temperature away from any heat source. Once fully dry, apply a good leather conditioner to replenish the oils that water exposure draws out. Never use a hairdryer or place it near a heater to speed up the drying process.
4. Will leather conditioner darken my vest permanently?
Most conditioners cause a slight temporary darkening that evens out as the product fully absorbs into the leather. However, heavier oils like mink oil or neatsfoot oil can cause a more noticeable and lasting color change, so always test on a hidden area first.
5. Is it safe to clean around embroidered patches on my vest?
Yes, but you need to be careful. Avoid saturating patches with cleaner or conditioner. Use a cotton swab to work around patch edges and apply products only to the leather sections, keeping the embroidery as dry as possible throughout the process




$129.95 - $159.95
$139.95 - $169.95


$139.95 - $169.95